DIY: TRES MARIAS TERRARIUMS

One of my favorite Spring/Summer projects to do with the kids is to make our own terrariums! It’s another fun and easy DIY that we all enjoy doing!

terrarium is a mini garden or forest in an open-faced glass container. The most commonly used plants in a terrarium are succulents. Think of a terrarium as an aquarium, but instead of fish, there are plants!
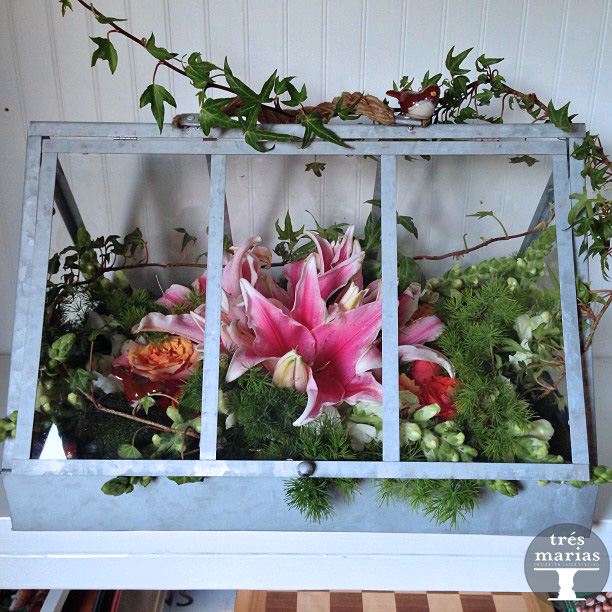
Terrarium Arrangement What’s neat about terrariums is that the plant adds life to any living space, yet, unlike most gardens, terrariums only require minimal care, thanks to the succulent plants that we use! This is a great way to start teaching the kids the responsibility of caring for plants. Terrariums need attentive care, but it’s not too demanding.

Here’s what we started working on. Follow the easy steps below to make your very own Tres Marias Terrarium, and don’t forget to tweet us your new decorations: @TresMariasParty!

DIY Terrariums (2).jpg
Materials
-Clear glass container (Fishbowl, cookie jar, vase with broad bottom, shallow dish, etc.,)
-Marble-sized rocks
-Sterilized potting soil
-Sheet moss
-Gloves
-Small plants of different colors, shapes, and textures. Miniature plants work the best, because they don’t grow too big for the container.
-Spray Bottle

Image courtesy of Atelier Florever

Steps
1. Clean your glass container using anti-bacterial soap.
2. Add your first layer of rocks: This will help to drain the terrarium of moisture.
3. Add your moss: This will help to keep soil from trickling down into the gravel layer.
4. Add your soil.
5. Add your plants in any arrangement that you want.
6. Spritz your new terrarium with a little bit of water, and if you are using all succulent-plants, water it once a month.

Easy Spring Lollipops to DIY With Your Blessings

Spring is right around the corner, and now that it’s spring forward daylight savings, the sun is up even longer–which means more time to do fun activities with my blessings.spring floral lollipops

This past weekend, I came across an easy DIY project via HGTVSpring Lollipops with Edible Pansy Flowers.

Here’s the recipe:
-2 Cups of Sugar
-2/3 cups of Corn Syrup
-2/3 Cup Water
-1 splash of Candy Flavoring Oil
-10 Pansy Petals, washed & patted dry
-10 wooden stir stick

1. Lollipop mold is recommended, but we didn’t use any. If you choose not to use a mold, pour 2 cups of the powdered sugar into your baking pan with a lip, and use the bottom of a flat-bottomed object to indent the sugar. Push that aside, we’ll use that in a bit, in replacement of the lollipop mold!

2. Stir together the sugar, corn syrup, and water in a small saucepan. Clip the candy thermometer to the side of your saucepan.

3. Using high-heat, bring the mixture to a boil. Without stirring, allow the mixture to reach 302° F. This is the hard-crack stage. Remove the pan from heat.

4. Mix in the flavoring oil, and if you’d like, add gel food coloring.

5. Once the mixture stops bubbling, drop the mixture into the powdered sugar mold using a metal spoon.

6. Place your pansy petal face down on the candy. Careful, it’s HOT! Use the wooden stick or lollipop stick to push the petal down into the candy.

7. Pour a little bit more candy mixture over the petal, just to encase the candy completely.

8. Place the wooden stick or lollipop stick into the candy, and turn the candy over.

9. Allow the candy to fully cool and harden. This should happen within 5 minutes. If you chose to use the powdered sugar mold, feel free to rinse the sugar off with a thin stream of water.

It’s as simple as that! I’d love to see the lollipops that you shared with your blessings! Feel free to tweet me your results: @tresmariasparty

Baby Ellie’s Fairy Cake

IMG_4526

I absolutely loved making this 3-Tiered Layer Cake this past weekend for a very adorable Baby Ellie.

The first and third tiers is a brand new Hot Milk Cake recipe. Hot Milk Cake is an old fashioned delicate and moist cake which is unique in that scalded milk is added to the batter.

Behind all the delicious buttercream of the first tier is a 4-stack with 3 layers of mascarpone-whipped cream filling. I then finished the bottom tier with luscious Swiss Meringue Buttercream and fondant flowers.
FullSizeRender copy

My middle tier is a 4-stack Chocolate Chiffon with 3 layers of frosting and ruffle icing.
IMG_1723Happy birthday, Baby Ellie! I hope you enjoyed your magical birthday!

For more Tres Marias goodies, head to the Tres Marias Party Facebook Page.

Welcome To The Tres Marias Party!

Facebook3.2(10am)

Inspired by my three daughters and son, thus Tres Marias and a Blessing, I’ve always been delighted at having an opportunity to celebrate life’s special occasions with family and friends. Planning and envisioning a theme or menu and seeing it come to fruition always brings me such joy.

The icing on the cake is witnessing the joy on our children’s faces as they are immersed in the moments that shape their childhood memories.

Memories are made with many little details that all come harmoniously together to create a sensory scene that enlivens the spirit and awakens the mind to new possibilities, whether it be a new combination of food, flavors and scents or a new artful way of presenting an array of floral interpretations or delectable dessert creations, celebrations are an opportunity to create indelible happy moments of time that leave lasting impressions for years to come. Entrust me for a moment and I’d be honored to serve and play a small part in your life’s special occasions.

Here, you will find different things that inspire me every day, family blessings that I share with my children, and recipes that I create with love. Welcome to the Tres Marias family!

For more blessings, follow Tres Marias Party on Instagram & Twitter.